Viz Playground - basic data viz with Vega
Oh no :-/ I haven’t written a post in so long!
For my second technical post, I had in mind something related to the talk I gave at PyCon Sweden 2017 back in September 2017 (here’s a link to my slides on Github). My idea then was to share my experience of trying a new data visualisation tool. This tool called Altair isn’t another data visualisation library as such, but a Python API to access the powerful and simple Vega-Lite JSON like grammar for interactive graphics (itself build on top of Vega).
Why Vega?
While it was fun and interesting to try out Altair (I used it for a personal project), it is still in the process of supporting Vega-Lite 2.0. So, I now decided to directly try out Vega.
The idea is still to have a go-to tool for creating a rapid data visualisation. Specific use cases would be a prototype, a hackathon project… Come on, don’t tell me you don’t have a dataset of interest to visualise and share with a colleague or the world (well, your Twitter followers at least)!
Vega generates web visualisation using either HTML5 Canvas or SVG. And here we’re working with Vega-Lite which provides a more concise syntax than Vega.
Create a Vega-Lite chart
Note: You can have a look at the plot on Blocks!
Vega-Lite visualisations are specified by JSON objects that can contain several properties like “name”, “description”, “title”, “data”, “transform”, etc…
To define a minimal chart you want to provide the “data”, “mark” and “encoding” properties.
- The
datasource is expected to be tabular data. It can be inline data (see below) or loaded from a file (JSON, CSV or TSV). [1] - The
markis the type of visualisation you need, in this case “bar” for a bar chart. It can be a simple string or amarkobject. [2] - The
encodingproperty links the data fields and the axis of the chart. In our case we’re creating an horizontal bar chart, so we’re inverting “x” and “y”. Here the “y” axis will display the “element” which is an “ordinal” data type as I’m using it as a label for each data point and want to keep the order. And the “x” axis will display the actual “value” field hence the type is “quantitative”. Theencodingcan have more properties to transform the data. [3]
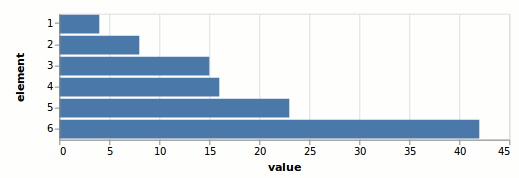
{
  "data": {
            "values": [{"element": 1, "value": 4},
	               {"element": 2, "value": 8},
	               {"element": 3, "value": 15},
	               {"element": 4, "value": 16},
	               {"element": 5, "value": 23},
	               {"element": 6, "value": 42}]
	  },
  "mark": "bar",
  "encoding": {
    "y": {
      "field": "element",
      "type": "ordinal"
    },
    "x": {
      "field": "value",
      "type": "quantitative"
    }
  }
}
You can copy/paste this code in a Vega editor!
Embed a Vega-Lite chart in html
The easier way to publish a Vega-Lite visualisation is to embed it using the libray Vega-Embed.
1) Add the CDN (content delivery network) links in your HTML page:
<script src="https://cdn.jsdelivr.net/npm/vega@3"></script>
<script src="https://cdn.jsdelivr.net/npm/vega-lite@2"></script>
<script src="https://cdn.jsdelivr.net/npm/vega-embed@3"></script>
2) Add a div where the visualisation will be attached <div id="vis"></div>.
3) Link the #vis div to the Vega-Lite chart object using the function vegaEmbed(), like this: vegaEmbed("#vis", chart);.
The chart object to be embedded contains “data”, “mark” and “encoding” properties as well as an optional JSON schema, “$schema”, and an optional “description”.
In my example below you can see the vegaEmbed function can take an extra optional property (called opt below). This gives you more control on the rendering of the visualisation.
Here I choose to render a SVG (instead of a PNG image) and I specify its size.
var chart = {
	  "$schema": "https://vega.github.io/schema/vega-lite/v2.json",
	  "description": "A simple bar chart with embedded data.",
	  "data": {
            "values": [{"element": 1, "value": 4},
	               {"element": 2, "value": 8},
	               {"element": 3, "value": 15},
	               {"element": 4, "value": 16},
	               {"element": 5, "value": 23},
	               {"element": 6, "value": 42}]
	  },
	  "mark": "bar",
	  "encoding": {
            "y": { "field": "element", "type": "ordinal" },
            "x": { "field": "value", "type": "quantitative" }
	  }
	  };

var opt = {
	  "mode": "vega-lite",
	  "renderer": "svg",
	  "width": 450,
	  "height": 450
	  };

vegaEmbed("#vis", chart, opt).then(function (result) {
	  }).catch(console.error);
This code creates the following chart:

Minimal interaction
I thought it would help the user experience to add a display of information about a data point when one hovers over said data point. For that I used the Vega plugin called Tooltip.
There isn’t much more to do once the chart is embedded in htlm.
1) Add links to Tooltip javascript and CSS CDNs:
<script src="https://cdn.jsdelivr.net/npm/vega-tooltip@[VERSION]"></script>
<link rel="stylesheet" type="text/css" href="https://cdn.jsdelivr.net/npm/vega-tooltip@[VERSION]/build/vega-tooltip.min.css">
2) Create a tooltip using the vegaTooltip.vegaLite() function using the Vega view and the Vega-Lite chart object:
vegaEmbed("#vis", chart, opt).then(function (result) {
      vegaTooltip.vegaLite(result.view, chart);
	  }).catch(console.error);
Here’s what the tooltip looks like:
And interact with it here.
My take away
I find Vega-Lite grammar super nice! The usage is straightforward and it’s very well documented! I’m definitely going to use it more in the future.
I’m also looking forward to the new version of Altair and I’ll try the Clojure API for Vega called Oz.
Notes:
[1] Vega-Lite data property: vega.github.io/vega-lite/docs/data.html
[2] Vega-Lite mark property: vega.github.io/vega-lite/docs/mark.html
[3] Vega-Lite encoding property: vega.github.io/vega-lite/docs/encoding.html
References:
-
More on Vega and Vega-Lite: vega.github.io/
-
Code and visualisation done for this blog post on Blocks
-
Read up options to embed Vega visualisations on Vega-embed Readme.
-
The Vega Tooltip plugin.